Tuesday, June 30, 2009
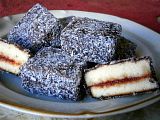
TWD Pineapple Daquise
Well I know I'm a week late but I really was in doubt wheather to make this Daquise as I don't like coconut too much and I was afraid it would be too sweet but luckily I've tried it and it was great !!! As someone else said we should always trust Dorie !
My computer is still making me crazy but tomorrow I'll leave for the beach and I don't know if I'll find a computer around , I'll bring Dorie's book along and maybe will post everything at the end of the month !!
Happy holidays !!!!
Sunday, June 28, 2009
Daring Baker's Bakewell Pudding
The June Daring Bakers' challenge was hosted by Jasmine of Confessions of a Cardamom Addict and Annemarie of Ambrosia and Nectar. They chose a Traditional (UK) Bakewell Tart... er... pudding that was inspired by a rich baking history dating back to the 1800's in England
I'm writing this post with my fingers crossed as in the last 10 days every time I was on the net my connection (?) lasted less 3 minutes ! I tried not usinf firefox and apparently......
This tart or pudding was a big success the other evening at some friends house even with the children ! We were having a ' kindergarden farewell' party as our children will start real school in September (sigh) .
I was going to use a simple peach jam I still had from last year but just as I came back home there was a jam jar on my front door saying 'ciliege 2009' (cherries) . It came from Silvia's mother who lives in Tuscany and grows all kind of organic wonders ! So I had to make it a cherry bakewell pudding !!
Bakewell Tart…er…pudding
Makes one 23cm (9” tart)Prep time: less than 10 minutes (plus time for the individual elements)Resting time: 15 minutesBaking time: 30 minutesEquipment needed: 23cm (9”) tart pan or pie tin (preferably with ridged edges), rolling pin
One quantity sweet shortcrust pastry (recipe follows)Bench flour250ml (1cup (8 US fl. oz)) jam or curd, warmed for spreadabilityOne quantity frangipane (recipe follows)One handful blanched, flaked almonds
Assembling the tartPlace the chilled dough disc on a lightly floured surface. If it's overly cold, you will need to let it become acclimatised for about 15 minutes before you roll it out. Flour the rolling pin and roll the pastry to 5mm (1/4”) thickness, by rolling in one direction only (start from the centre and roll away from you), and turning the disc a quarter turn after each roll. When the pastry is to the desired size and thickness, transfer it to the tart pan, press in and trim the excess dough. Patch any holes, fissures or tears with trimmed bits. Chill in the freezer for 15 minutes.
Preheat oven to 200C/400F.
Remove shell from freezer, spread as even a layer as you can of jam onto the pastry base. Top with frangipane, spreading to cover the entire surface of the tart. Smooth the top and pop into the oven for 30 minutes. Five minutes before the tart is done, the top will be poofy and brownish. Remove from oven and strew flaked almonds on top and return to the heat for the last five minutes of baking.
The finished tart will have a golden crust and the frangipane will be tanned, poofy and a bit spongy-looking. Remove from the oven and cool on the counter. Serve warm, with crème fraîche, whipped cream or custard sauce if you wish.
When you slice into the tart, the almond paste will be firm, but slightly squidgy and the crust should be crisp but not tough.
Jasmine’s notes:• If you cannot have nuts, you can try substituting Victoria sponge for the frangipane. It's a pretty popular popular cake, so you shouldn't have any troubles finding one in one of your cookbooks or through a Google search. That said, our dear Natalie at Gluten a Go Go has sourced some recipes and linked to them in the related alt.db thread.• You can use whichever jam you wish, but if you choose something with a lot of seeds, such as raspberry or blackberry, you should sieve them out.• The jam quantity can be anywhere from 60ml (1/4 cup) to 250ml (1cup), depending upon how “damp” and strongly flavoured your preserves are. I made it with the lesser quantity of home made strawberry jam, while Annemarie made it with the greater quantity of cherry jam; we both had fabulous results. If in doubt, just split the difference and spread 150ml (2/3cup) on the crust.Annemarie’s notes:• The excess shortcrust can be rolled out and cut into cookie-shapes (heck, it’s pretty darned close to a shortbread dough).
Sweet shortcrust pastry
Prep time: 15-20 minutesResting time: 30 minutes (minimum)Equipment needed: bowls, box grater, cling film
225g (8oz) all purpose flour30g (1oz) sugar2.5ml (½ tsp) salt110g (4oz) unsalted butter, cold (frozen is better)2 (2) egg yolks2.5ml (½ tsp) almond extract (optional)15-30ml (1-2 Tbsp) cold water
Sift together flour, sugar and salt. Grate butter into the flour mixture, using the large hole-side of a box grater. Using your finger tips only, and working very quickly, rub the fat into the flour until the mixture resembles bread crumbs. Set aside.
Lightly beat the egg yolks with the almond extract (if using) and quickly mix into the flour mixture. Keep mixing while dribbling in the water, only adding enough to form a cohesive and slightly sticky dough.
Form the dough into a disc, wrap in cling and refrigerate for at least 30 minutes
Jasmine’s notes:• I make this using vanilla salt and vanilla sugar.• If you wish, you can substitute the seeds of one vanilla bean, one teaspoon of vanilla paste or one teaspoon of vanilla extract for the almond extract
Frangipane
Prep time: 10-15 minutesEquipment needed: bowls, hand mixer, rubber spatula
125g (4.5oz) unsalted butter, softened125g (4.5oz) icing sugar3 (3) eggs2.5ml (½ tsp) almond extract125g (4.5oz) ground almonds30g (1oz) all purpose flour
Cream butter and sugar together for about a minute or until the mixture is primrose in colour and very fluffy. Scrape down the side of the bowl and add the eggs, one at a time, beating well after each addition. The batter may appear to curdle. In the words of Douglas Adams: Don’t panic. Really. It’ll be fine. After all three are in, pour in the almond extract and mix for about another 30 seconds and scrape down the sides again. With the beaters on, spoon in the ground nuts and the flour. Mix well. The mixture will be soft, keep its slightly curdled look (mostly from the almonds) and retain its pallid yellow colour.
Annemarie’s notes:• Add another five minutes or more if you're grinding your own almonds or if you're mixing by hand (Heaven help you).
Monday, June 22, 2009
BBD # 21 Pizza Party
Some time ago looking for a sourdough recipe for pizza I found this on the cookaround forum : it's a super succesful recipe coming from Cinzia !
We usually make a variety of toppings : zucchine, tomatoes and anchovies, potatoes....... but if I don't make the favorite one .... I'm in danger !!
Cipolle !!!! (Onions !!)
Sourdough Pizza
280 gr sourdough
450 gr bread flour
250 gr hard durum wheat flour
400 ml water
40 gr extra virgin olive oil
2 teaspoons salt
Mix everything in the morning and let rise around 5 hours. Shape the pizzas, oil the surface and cover with cling film for around 5 more hours, turn on the oven at the highest setting (I use a baking stone). Meanwhile prepare the toppings. Bake for around 15 minutes. Buon Appetito !!!
Thursday, June 18, 2009
TFF Hot and Sour Soup
HOT ??!!! In this heat ? Yes ! It sounded crazy to my husband to have a hot soup the other evening but as soon as he tasted it his doubts had desappeared! Andrea and our friends fought over the leftovers in the pot ! If you dare try a hot soup in a very hot June this will make your dinner !! Please visit the blog for more Tyler Florence inspired recipes !!
Tuesday, June 16, 2009
TWD Honey Peach Ice Cream
Apparently this ice cream was either liked or definitely not .. well for once we all liked it : even Carlo !
I did put the peaches pieces (!) in the ice cream but I made very small pieces so they weren't a bother at all !
My internet is really making me crazy now I have problems with firefox we'll see what comes next !! See you with the fattening daquise next week ! (My mother is leaving the hospital tomorrow so no more guinea-pig nurses !!)
Thanks to Tommi of Brown Interior who chose the recipe for this week and will post the recipe on her blog. Please visit all the clever Twders for more ice cream !!!
Sunday, June 14, 2009
Daring Cooks' Chinese dumplings/potstickers
Finally my computer is working again ! And I'm so happy to be able to post the wonderful recipe from Jen of use real butter her potsticker are just a wonder ! They come together quite fast and are so good !!
We had a great time eating these dumplings and remembering last time I tried to make them which was nine years ago and, to make Andrea happy, I had bought a chinese book about dim sum, gotten all the ingredients from a chinese store and... became crazy making all sorts of fillings and doughs up to late night ! The next day I found out the reason of my 'more than usual' craziness : I was pregnant !
Now Carlo is eight years old and thanks to Jen, Andrea finally had some great homemade dumplings !
Please try this recipe but visit Jen post before and all the Daring Cooks' blogs !!
(Of course the following photos are my potsickers coming together : Jen's are much better !!)
Chinese Dumplings/Potstickers
pork filling:
1 lb (450g) ground pork
4 large napa cabbage leaves, minced
3 stalks green onions, minced
7 shitake mushrooms, minced (if dried - rehydrated and rinsed carefully)
1/2 cup (75g) bamboo shoots, minced
1/4 (55g) cup ginger root, minced
3 tbsp (40g) soy sauce
2 tbsp (28g) sesame oil
2 tbsp (16g) corn starch
OR
shrimp filling:
1/2 lb (225g) raw shrimp, peeled, deveined, and coarsely chopped
1/2 lb (225g) ground pork
3 stalks green onions, minced
1/4 cup (55g) ginger root, minced
1 cup (142g) water chestnuts, minced (I substituted some zucchini)
1 tsp (5g) salt
3 tbsp (40g) sesame oil
2 tbsp (16g) corn starch
dough: (double this for the amount of filling, but easier to make it in 2 batches - or just halve the filling recipe)
2 cups (250g) all-purpose flour
1/2 cup (113g) warm water
flour for worksurface (I weighted the ingredients and didn't need any)
dipping sauce:
2 parts soy sauce
1 part vinegar (red wine or black)
a few drops of sesame oil
chili garlic paste (optional)
minced ginger (optional)
minced garlic (optional)
minced green onion (optional)
sugar (optional)
Combine all filling ingredients in a large mixing bowl and mix thoroughly (I mix by clean hand). Cover and refrigerate until ready to use (up to a day, but preferably within an hour or two).
Make the dough, Method 1: Place the flour in the work bowl of a food processor with the dough blade. Run the processor and pour the warm water in until incorporated. Pour the contents into a sturdy bowl or onto a work surface and knead until uniform and smooth. The dough should be firm and silky to the touch and not sticky.[Note: it’s better to have a moist dough and have to incorporate more flour than to have a dry and pilling dough and have to incorporate more water).
Make the dough, Method 2 (my mom’s instructions): In a large bowl mix flour with 1/4 cup of water and stir until water is absorbed. Continue adding water one teaspoon at a time and mixing thoroughly until dough pulls away from sides of bowl. We want a firm dough that is barely sticky to the touch.
[EDIT: 5/26/09] There have been two complaints posted about a dry dough and I realize that this rests in the problem of measuring flour which has a different density and hence weight for 2 cups depending on how you scoop it. That is why I also list the weight: 250g. Flour tends to settle over time, so when I scoop it out, I shake several cups' worth back into the container before taking a final scoop of soft, fluffy, flour and I get 250g for 2 cups. When you knead the dough, if it feels hard and dry, then you can add more water. [Warning: it will NOT be a soft bread dough, so don't expect it to be, but it shouldn't be a brick either.] It is perfectly fine to use more than the 1/2 cup listed in the recipe as everyone's climate and flours vary. Use your judgment - this is what being a Daring Cook is about. We are trying to cultivate a sense of intuition so that recipes are general guidelines from which you can expand your own style.
Both dough methods: Knead the dough about twenty strokes then cover with a damp towel for 15 minutes. Take the dough and form a flattened dome. Cut into strips about 1 1/2 to 2 inches wide. Shape the strips into rounded long cylinders. On a floured surface, cut the strips into 3/4 inch pieces. Press palm down on each piece to form a flat circle (you can shape the corners in with your fingers). With a rolling pin, roll out a circular wrapper from each flat disc. Take care not to roll out too thin or the dumplings will break during cooking - about 1/16th inch. Leave the centers slightly thicker than the edges. Place a tablespoon of filling in the center of each wrapper and fold the dough in half, pleating the edges along one side (see images in post for how to fold pleats). Keep all unused dough under damp cloth.
To boil: Bring a large pot of water to a boil and add dumplings to pot. Boil the dumplings until they float.
To steam: Place dumplings on a single layer of napa cabbage leaves or on a well-greased surface in a steamer basket with lid. Steam covered for about 6 minutes.
To pan fry (potstickers): Place dumplings in a frying pan with 2-3 tbsp of vegetable oil. Heat on high and fry for a few minutes until bottoms are golden. Add 1/2 cup water and cover. Cook until the water has boiled away and then uncover and reduce heat to medium or medium low. Let the dumplings cook for another 2 minutes then remove from heat and serve.
To freeze: Assemble dumplings on a baking sheet so they are not touching. It helps to rub the base of the dumpling in a little flour before setting on the baking sheet for ease of release. Freeze for 20-30 minutes until dumplings are no longer soft. Place in ziploc bag and freeze for up to a couple of months. Prepare per the above instructions, but allow extra time to ensure the filling is thoroughly cooked.
To serve: Serve dumplings or potstickers hot with your choice of dipping sauce combinations.
Tuesday, June 9, 2009
TWD Parisian Apple Tartlet
Dear friends now I have troubles with my provider they are checking it but it may take up to two days so I'm posting without photos from Cristina's computer !! I enjoied very much the tartlets I made apples, peaches and plums and liked all of them !! Next time I'd like to make my own puff pastry though !This week we thank Jessica of My Baking Heart who chose this as our recipe.
Sunday, June 7, 2009
BBA Sourdough Bagels
Last week on our Crazy and Funny 'Bread Baker's Apprentice' group we baked Bagels !
Since I lived in the U.S. I haven't had bagels exept when some friends came and were amazed at my request to bring me some bagels. I really love them and must admit that mine weren't as good as the real thing ....but this leads me to give them more than another trial .
Please visit the BBA Challenge all the others results are stunning !
Tuesday, June 2, 2009
BBA Artos Greek Celebration Bread
After seeing so many beautiful Artos breads in many beautiful shapes I feel ashamed of my silly buns but they look much better than my braid and are simpler to hide in the freezer !
I really enjoied this recipe and the smell that came out of the oven when it was baking. I made it plain with the spices and orange zest but without dried fruits and nuts and maybe next time I'll add some raisins.
Please check about the BBA Challenge !!!
TWD Cinnamon Squares
Last week's recipe is still waiting (I'm trying to lose some weight and the amount of calories scared me ! ) but I decided to make the Cinnamon Squares first (and take them right away to the nurses at the hospital where my mother is staying to learn how to move the new knee ) but I forgot to add the melted butter so I don't know how it will turn out !
So as you can see the chocolate sank too !! I don't know how the nurses will take it !
Thanks to Tracey of My Culinary Adventures for choosing this recipe! You can find the recipe on her blog or in Dorie's book. Don't forget to check out the TWD blogroll!
Monday, June 1, 2009
Recipes to Rival Beans, Beans the magical fruit...
When I saw the recipes we had to try for this month's challenge I was really happy as we all love chick peas in every form. I didn't imagine I was going to prepare them on the last possible day though !!
Anyway to make chickpeas the stars of the day we had pasta e ceci for lunch and I prepared the dough for the fritters as well as the felafel
and something very tipical of Liguria and Nice : Farinata di ceci (Socca in french).
But the felafel and the Farinata will be ready for dinner so I will add more photos later !!
I think I put too much water in the fritters dough so when I tried to fry it it spread everywhere and , even if the kids really enjoied the paper thin fritters, when I couldn't anymore fish the tiny bits of fritters in the panI decided to bake them. And they liked them as well....
SSB Lemon Curd Muffins
And here is another very nice and simple recipe from Maria and Rosie of Sweet and Simple Bakes. The recipes they choose are always a hit at our house. My muffins didn't rise much but nobody complained !! I made the lemon curd in the microwave so I must say it took me less than an hour to bake and (almost) enjoy these muffins !!
Please visit the site and join us next month !!
Lemon Curd Muffins
Makes 12 Muffins
Ingredients
200g/7oz self-raising flour
100g/3 ½ oz golden caster sugar
1 large egg
75ml/3fl oz sunflower oil
150ml/5fl oz milk
½ tsp vanilla extract
60ml/12 tsp lemon curd
For the sugar coating:
60ml/4 tbsp lemon curd
50g/2oz golden caster sugar
Heat the oven to 190oC/375oF/gas 5. Line a 12 hole muffin tin with paper cases.
Sieve the flour into a bowl and stir in the sugar. In a large jug mix together the egg, sunflower oil, milk and vanilla extract using a fork. Pour the wet ingredients into the dry and stir gently together until just combined. Put a teaspoon of mixture in the base of each paper case. Top with 1 tsp lemon curd. Top with the rest of the muffin mixture.
Bake for 10-15 minutes until risen and firm.
For the sugar coating, microwave the lemon curd on high for 1 minute until melted. Put the sugar into a shallow bowl. Brush on top of each muffin and dip the tops of each one in sugar to coat the tops.